Some haircuts follow fashion and some keep being rediscovered by it. The finger wave bob belongs to the second kind: those smooth, sculpted S-waves, pressed close to the head and ending in a neat chin-length bob, have been turning heads for a hundred years because they do something few styles can — they look like sculpture and they frame a face like jewellery. The modern version is softer than the 1920s original, with a little more movement at the ends, but the gloss and the discipline are the same.
This guide shows nine ways to wear a sculpted finger wave bob, from the classic high-gloss evening version to a brushed-out daytime softness, with the step-by-step styling routine that creates those waves at home, the exact conversation to have with your stylist before the cut, and the upkeep that keeps a precision style like this looking intentional rather than grown-out.
Why the Finger Wave Bob Flatters Almost Everyone
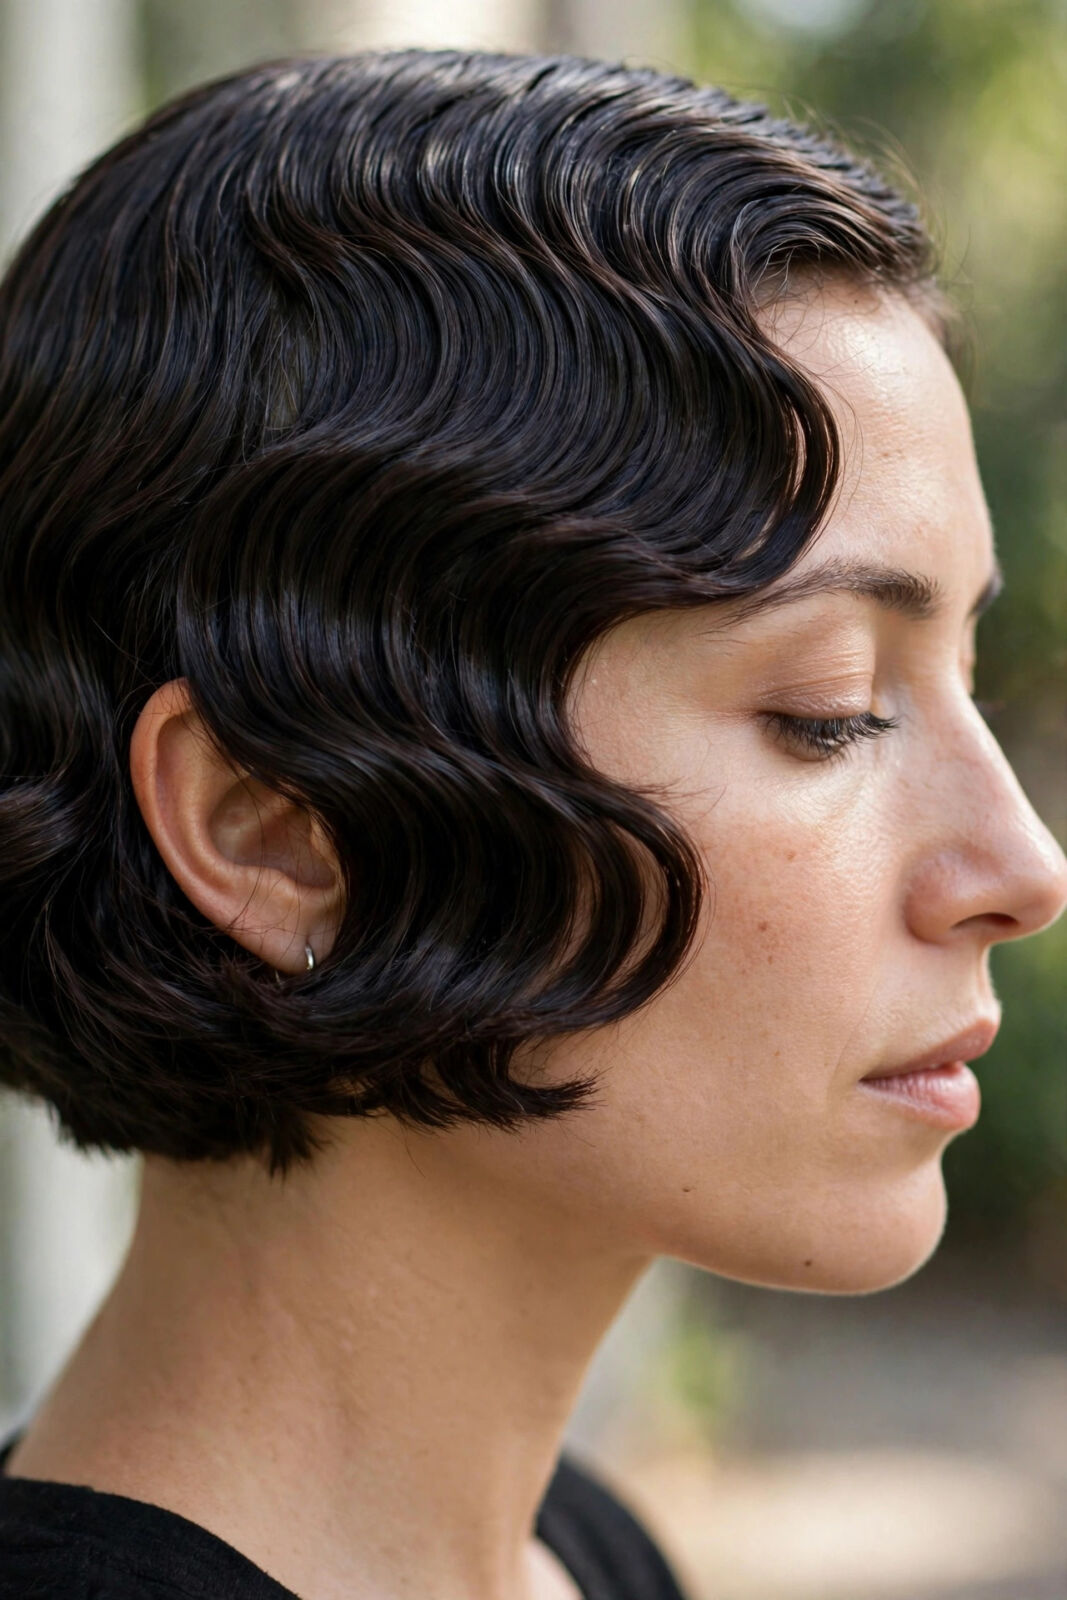
Finger waves work with the head’s shape instead of against it. The S-curves are moulded along the skull, so the style adds polish without adding bulk at the sides — the thing short-haired clients most often fear. The ridges of the waves catch light in bands, which is why waved hair looks glossier than the same hair worn straight, and the deep side part most versions use gives cheekbones a diagonal line to play against.
The bob length is doing quiet work too. Ending at the chin or just below, it draws a clean frame around the jaw and leaves the neck bare, so earrings and necklines show properly.
1. The Classic High-Gloss Evening Wave
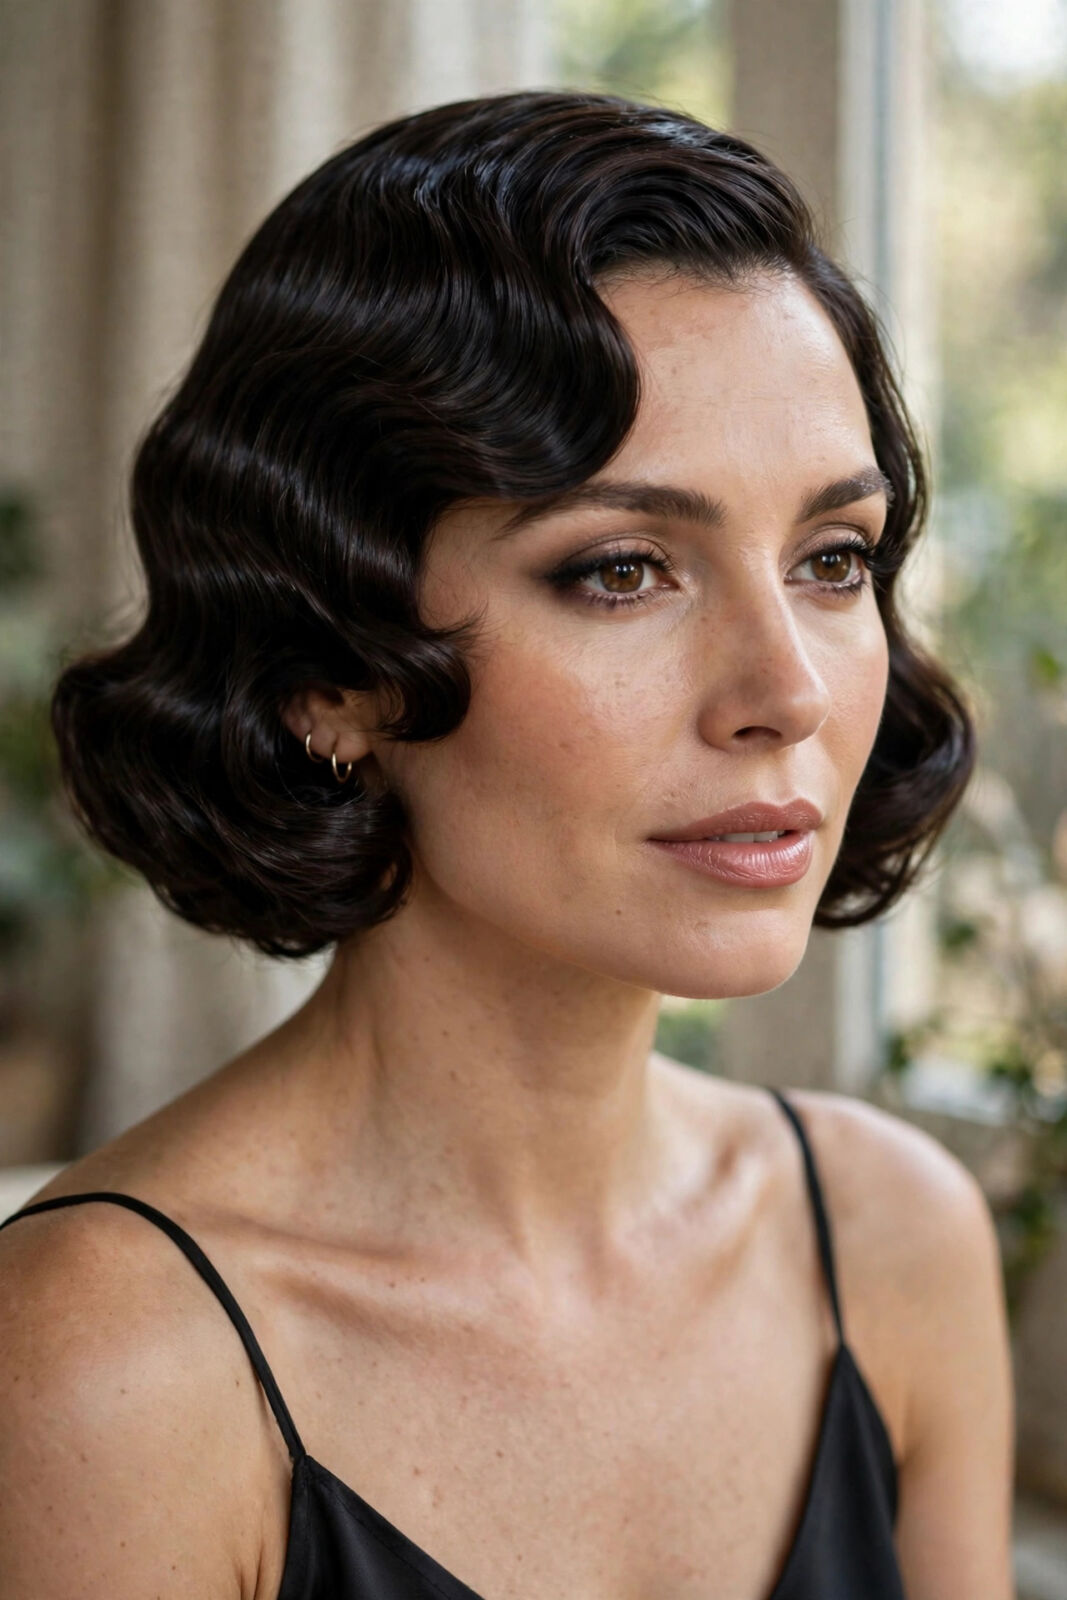
This is the reference version: deep side part, waves sculpted tight and even, finished to a mirror shine, exactly as in the first photo. It asks for strong-hold gel and patience, and it repays both — this is the style that survives a whole evening of dancing and still looks set in the last photograph. Pair it with a simple neckline and let the hair be the ornament.
2. Soft Brushed-Out Daytime Waves
For day, take the same set and brush it gently through once it is fully dry. The ridges soften into rolling waves with movement at the ends, and the whole thing reads as polished rather than set. This is the most wearable version for work — it keeps the shape and the shine but loses the formality, and it forgives a less-than-perfect home set far better than the glossy version.
3. Blonde Finger Waves With a Red Lip
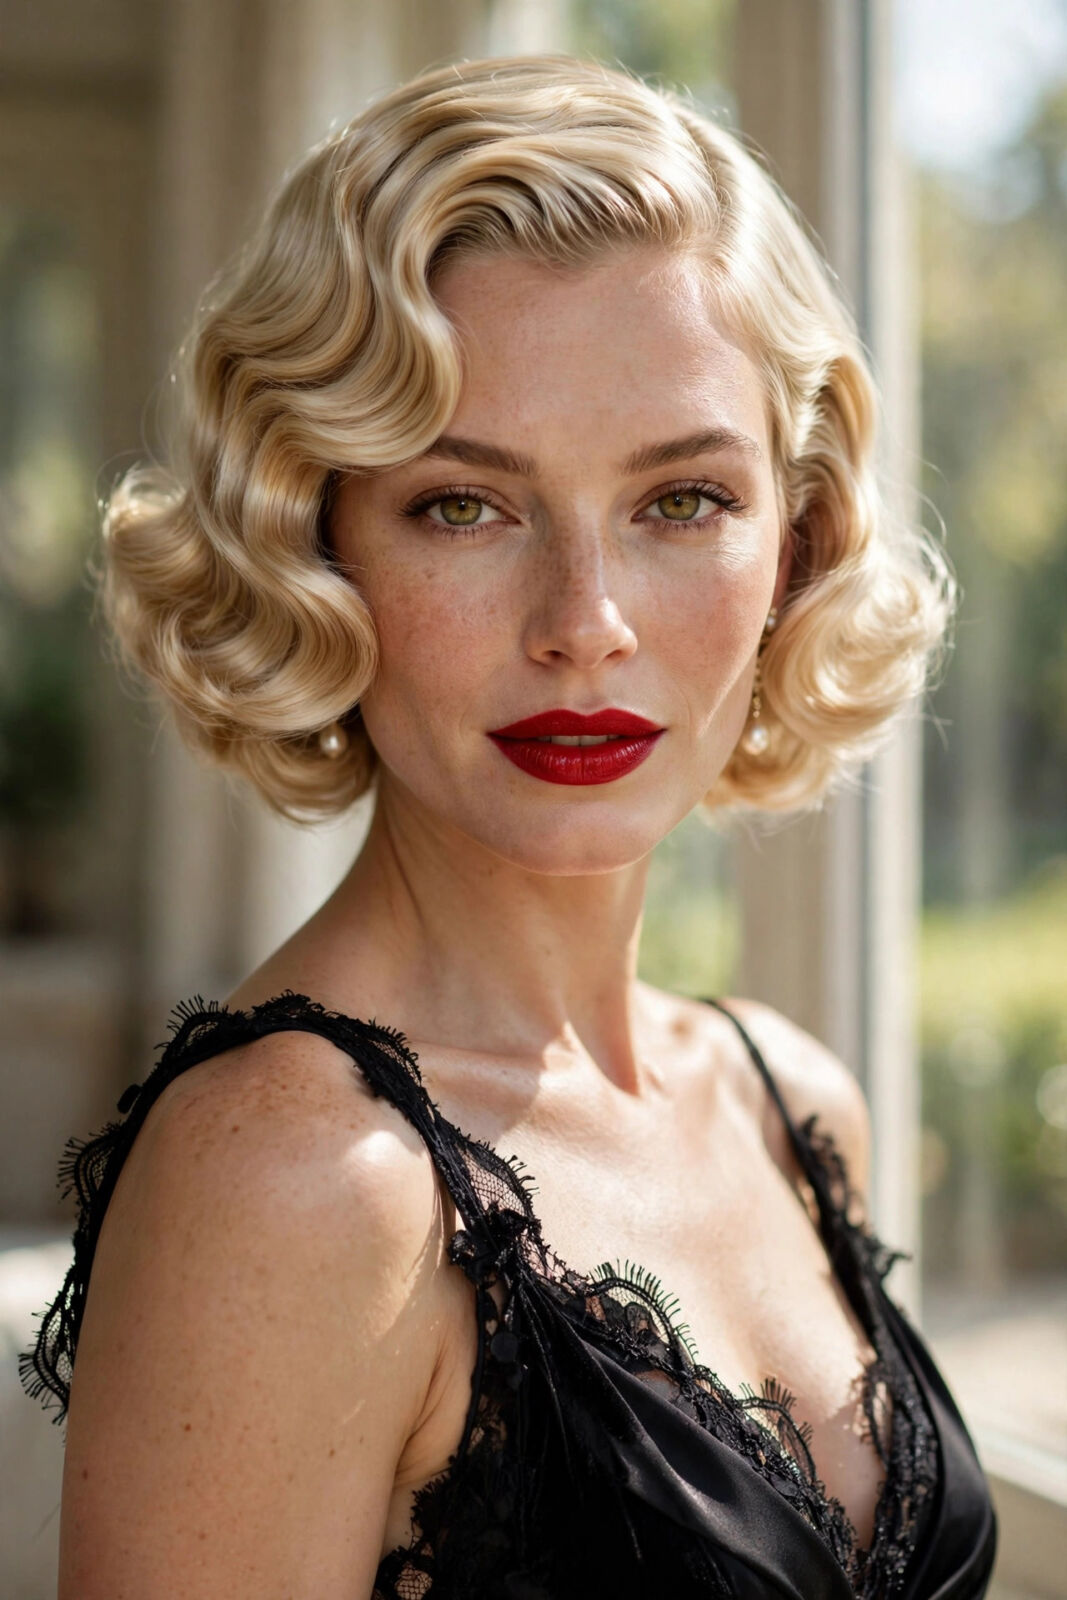
On blonde hair the waves read as light and shadow — bright ridges, deeper troughs — and the effect is pure old-Hollywood, as the fourth photo shows. Blonde waved bobs love a stronger lip colour to balance all that pale shine. If your hair is highlighted, the waves will show extra dimension where the lighter pieces sit on the ridges; ask your colourist to keep the brightest pieces around the face for exactly this reason.
4. The Deep Side Part and Tucked Side
Move the part further over — almost above the outer corner of the eyebrow — and tuck the smaller side smoothly behind the ear. The asymmetry sharpens the whole style and shows off an earring. This is the easiest variation of all because it needs no new technique, just a parting decision, and it suits rounder faces particularly well by adding that strong diagonal.
5. Waves With a Satin Dress for Events
The rooftop look in the last photo: waved bob, satin slip dress, bare shoulders. Satin and set waves share the same language — smooth, light-catching, deliberate — so they amplify each other. For weddings and evening events this pairing is a reliable formula, and because the hair is controlled, there is no weather anxiety about frizz undoing the outfit by midnight.
6. Dressed Down With a Tee and Jacket
A waved bob with a plain tee, jeans and a blazer is a brilliant contrast outfit — the hair says occasion, the clothes say Tuesday, and together they look like style rather than effort. Wear the softer brushed-out version here so the contrast stays relaxed.
7. The Marcel-Wave Front, Loose Back
If a full head of sculpted waves feels like a commitment, wave only the front section — the hairline and the parting side — and let the back sit in a smooth, loose bob. From the front you get the full vintage effect; from behind, an easy modern cut. It is also far quicker to style on a busy morning, since the detailed work is concentrated in one section.
8. Longer Lob-Length Waves
The waves work just as well when the bob grows to lob length, grazing the collarbone. The S-curves get longer and lazier, the effect softer and more romantic, less deco and more undone glamour.

9. Accessorised: Clips, Slides and a Velvet Bow
A style this smooth is a perfect base for one beautiful accessory: a crystal slide above the tucked side, two pearl pins along a ridge, or a small velvet bow at the back. Keep it to one piece and place it where the waves are flattest so it sits flush.
How to Set Finger Waves at Home, Step by Step
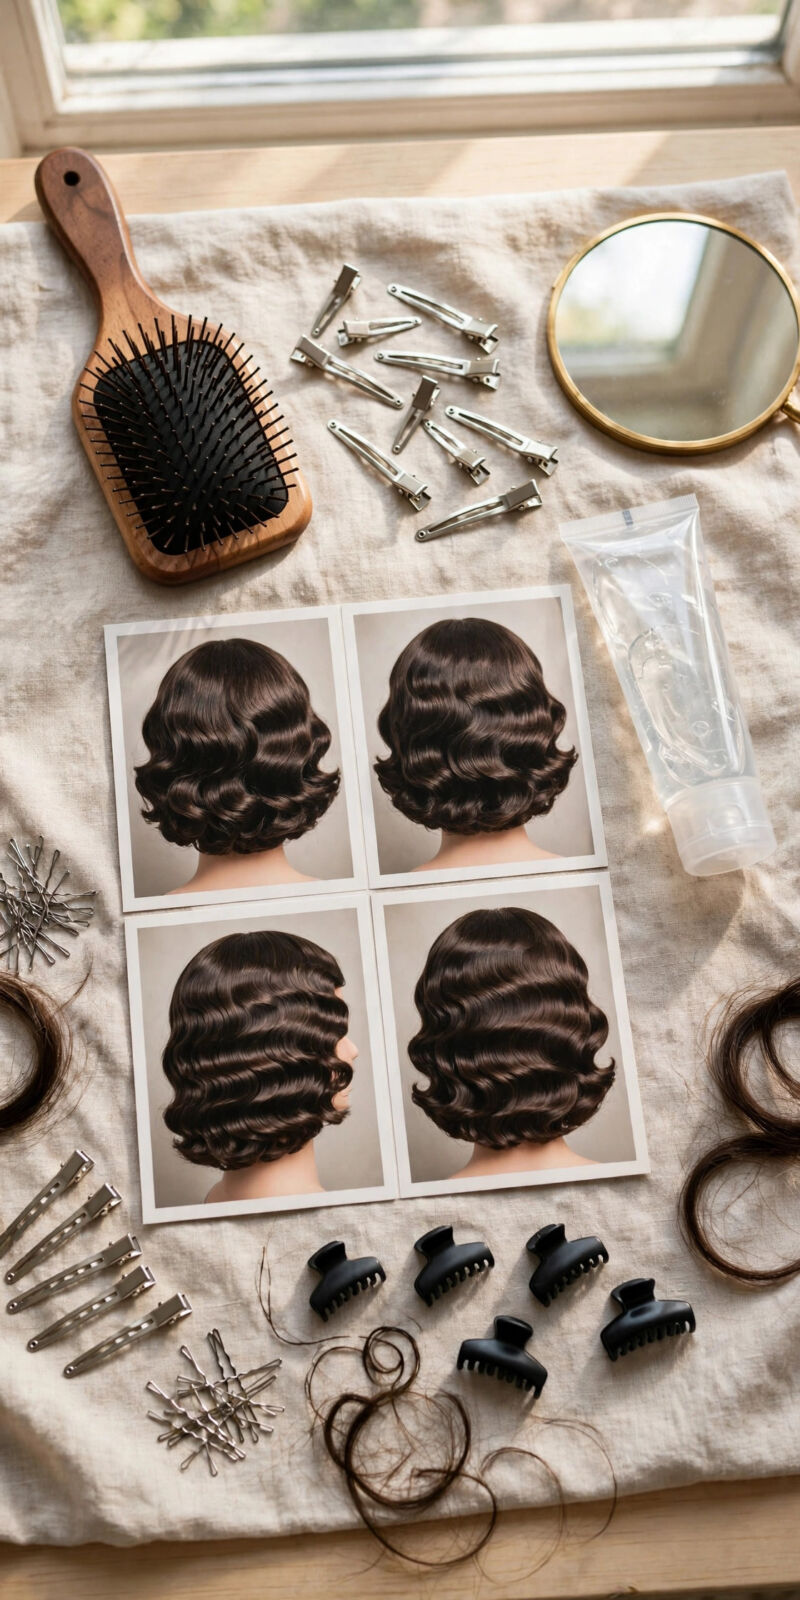
Step 1: Start on soaking wet hair with strong gel. Finger waves are moulded, not dried into shape, so hair must be dripping wet and loaded with a strong-hold gel or setting lotion from roots to ends. Work on freshly washed, conditioned hair, and keep a spray bottle beside you — the moment a section starts to dry, mist it again. Dry hair will not take a wave, full stop.
Step 2: Comb in the part, then the first S. Comb everything back smoothly, then make your side part. Starting at the part, comb a two-inch section forward toward the face, then use your middle finger to hold the ridge while you comb the hair below it back in the opposite direction — that push-pull is what forms the S. Work ridge by ridge, front to back, keeping each wave the same width.
Step 3: Pin every ridge as you go. Slide a flat wave clip along each ridge the moment you form it. Do not move on hoping it will hold — wet gel waves drift. Alternate direction with each row, and try to keep the waves aligned around the head so the pattern reads as continuous sculpture rather than separate sections.
Step 4: Dry completely without touching. This is the discipline step: the set must dry fully — hood dryer if you have one, cool air from a distance if not — before any clip comes out. Touching half-dry waves breaks the cast and frizzes the ridges. Fully dry hair will feel crisp; that crispness is the gel cast, and it is meant to be there.
Step 5: Release, then soften with a brush or fingers. Remove clips gently, ridge by ridge. For the classic glossy finish, smooth a drop of shine serum over the surface with your palms without disturbing the pattern. For the daytime version, brush through once, slowly, and let the waves settle into their softer arrangement. Never re-wet a finished set to fix it — reset the one section or leave it; fiddling is what undoes the shine.
What to Ask Your Stylist, and Upkeep
Before the cut, show photos and agree three things: the finished length with waves in (waves shorten the apparent length, so a chin-length waved bob is cut a little longer than a straight one), how blunt the ends should be (a mostly blunt perimeter with minimal layering waves best — heavy layers break the S pattern), and where your part will live, since the cut can be weighted to favour it. For upkeep, plan a trim every five to six weeks — a sculpted bob shows growth faster than a loose style because the perimeter is the design. Sleep on a silk pillowcase or wrap the set in a silk scarf at night; a good evening set can genuinely survive to a softer second day, which makes the styling effort pay twice.
Common Mistakes to Avoid
The biggest home-styling mistake is working on hair that is not wet enough — damp hair takes a weak wave that drops within the hour, and the style gets blamed instead of the prep. Second is removing clips early out of impatience; a ninety-percent-dry set collapses exactly like a cake taken out too soon. Third is over-layering the cut or asking for a very short bob and full waves together: tiny lengths cannot complete an S, so below a certain shortness the style becomes ridges without flow. And skip the heavy oils before setting — oil under gel stops the cast forming, so save oils for a finishing drop on the surface only.
Frequently Asked Questions
How long does a finger wave set take to do at home?
Allow forty minutes to an hour including drying, the first few times. With practice the moulding itself takes about fifteen minutes and the rest is hands-off drying. It is a style to set for an occasion or a few days of wear — with a silk scarf at night, many people get a second, softer day from one set.
Does the finger wave bob suit fine or thin hair?
It is one of the best styles for fine hair, because the waves are moulded close to the head and create the impression of density through light and shadow rather than volume. Use a lighter gel so fine strands are not weighed down, and keep the length at or above the chin so the ends stay full-looking.
Can I get finger waves with thick or curly hair?
Yes, but the approach changes: thick hair needs smaller sections, more gel and longer drying, and naturally curly hair should be smoothed first — either blow-dried straight while wet or set from a stretched state — so the moulded S reads clearly. Many people with curly hair find a stylist set lasts them a full week, making salon sets worthwhile.
How often does a waved bob need trimming?
Every five to six weeks keeps the perimeter crisp and the wave pattern sitting where it was designed to sit. Because the style is precise, growth shows as the bottom ridge dropping out of alignment. If you are growing it into a lob, tell your stylist — trims become shaping appointments instead and the waves get longer and softer, as in this guide.
Will finger waves damage my hair?
They are one of the gentlest set styles going: no heat is required, no backcombing, no tight tension. The main risks are over-gelling, which dries hair out over time, and brushing out a set roughly. Use a light conditioner before setting, a drop of oil after, and remove the set with patience, and the style is kinder than most daily blow-dries.
A Last Word Before You Wear It
A sculpted finger wave bob is not a costume — it is a precision haircut plus one learnable skill. Get the cut mostly blunt, practise the wet-set twice without an audience, respect the drying time, and you own a style that has outlasted every trend thrown at it for a century. Start with the soft brushed-out version for day; the full glossy sculpture will be waiting when the occasion is.