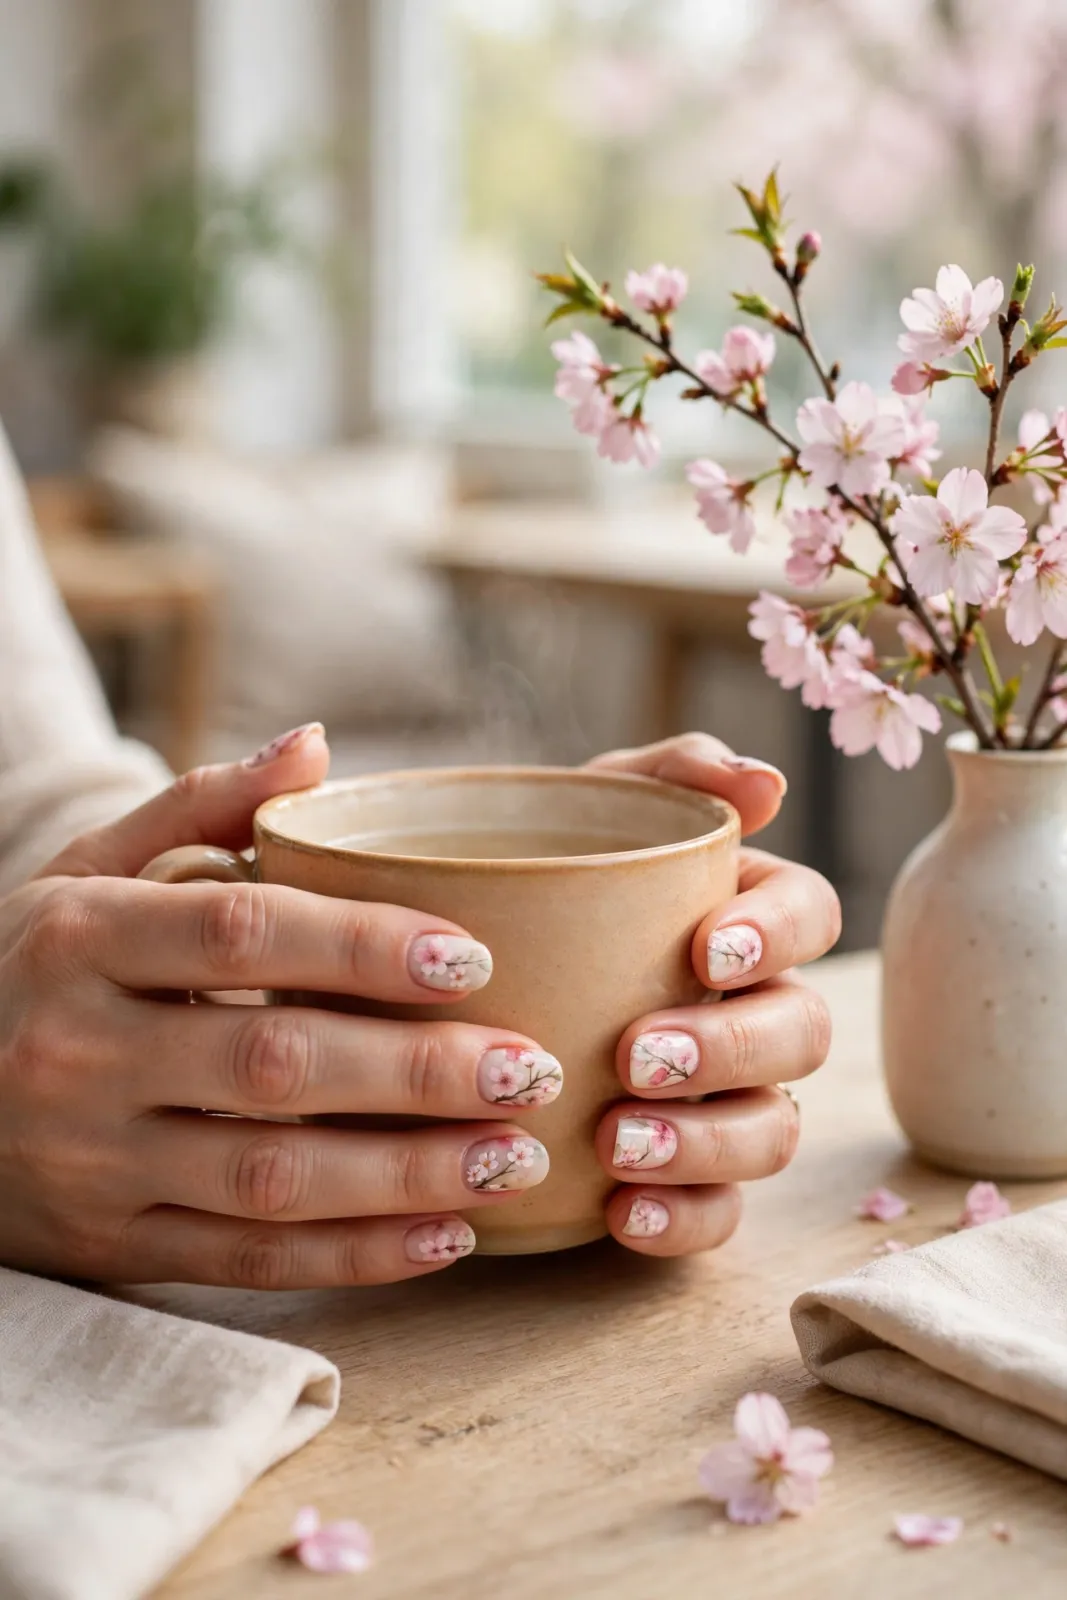
Every spring I go looking for one manicure that feels like the season itself, and this year it is cherry blossom watercolour nails. The design is soft in a way a flat pastel never quite manages: petals that look painted with a wet brush, edges that melt into a milky base, and tiny brown branch strokes that keep the whole thing from turning sugary. It photographs beautifully, but more importantly it wears beautifully, because the fade at the cuticle hides growth better than almost any art I have tried.
What makes the watercolour technique special is the layering. Nothing is fully opaque. Each petal is a whisper of pink laid over the last, so the nail keeps a glassy, real-flower softness. Below are the nine versions I keep coming back to, a step-by-step for painting your own, and the small mistakes that make blossom nails look muddy instead of delicate.

1, 2 and 3: Soft and Classic Blossom Looks
Way 1 — the sheer milky base with scattered petals. This is the version in the first photo and the one I recommend to anyone new to nail art. A translucent milky-pink base, two or three soft petals drifting across each nail, nothing symmetrical. Because the base is sheer, small imperfections disappear, and the design suits short, natural nails just as well as longer ones.
Way 2 — the full-garden accent nail. Keep eight nails in a plain glossy blush, then let the ring fingers carry a fuller branch of blossoms. The contrast makes the art look intentional and expensive, and it halves your painting time. It is also the easiest version to refresh: repaint the plain nails in ten minutes and the set looks new again.
Way 3 — blossom French tips. Instead of a white smile line, petals cluster along the free edge so the tip itself becomes the flower bed. From a distance it reads as a French manicure; up close it is all blossom. This is my pick for weddings and photos, because it never fights with rings or bouquets.

4, 5 and 6: Deeper Colour and Modern Twists
Way 4 — the deeper rose watercolour. The fourth photo shows a richer take: petals built up in rose and berry tones, concentrated near the tips. It suits evenings and deeper skin tones beautifully, and because the colour is stronger, you can skip the branch strokes entirely and let the petals carry the design on their own.
Way 5 — blossom over a nude jelly base. A warm nude jelly base makes the pink petals glow like they are lit from behind. This version is the most forgiving on uneven nail beds, since the jelly blurs ridges. Add one tiny gold dot at the centre of the largest flower if you want a hint of sparkle without glitter.
Way 6 — the short squoval spring set. Blossom art is not only for long almond nails. On short squoval nails, paint one small branch sweeping across two neighbouring nails, so the design connects when your fingers rest together. It looks clever in photos and stays practical for typing, cooking and everything else real life involves.

7, 8 and 9: Finishing Touches That Change the Mood
Way 7 — matte petals, glossy base. A matte top coat over just the petals, with the base left glossy, gives a velvety flower-on-glass effect. It is subtle, modern, and hides minor brush strokes better than a full gloss finish. Ask your technician for a matte finish coat only on the art layer, sealed with a final thin gloss around it.
Way 8 — one branch, all five nails. For a truly artistic set, paint a single branch that travels across all five nails of one hand, thumb to little finger. Each nail holds one section. It takes patience and a steady hand, but at a salon it is a reasonable request if you show a reference photo and book nail-art time.
Way 9 — petals with a pearl sheen. A whisper of pearl chrome rubbed over the finished art softens every edge and gives the petals a porcelain glow. Keep the chrome very light; too much turns watercolour into frost. This finish catches the light in the loveliest way when you hold a cup or a bouquet, as in the last photo.
How to Paint Watercolour Blossom Nails, Step by Step
Start with clean, shaped nails and a ridge-filling base coat; watercolour art shows every bump underneath. Lay down two thin coats of your milky or jelly base and let each dry fully — rushing here is what causes dragging later. On a palette, thin your pink polish with a drop of clear top coat until it behaves like weak tea. With the finest brush you own, press and lift to form petal shapes rather than painting outlines; five uneven petals make one blossom. While the pink is still slightly wet, touch a deeper rose into the centre of each flower and watch it bloom outward. Add branch strokes last with a thinned brown, using the very tip of the brush and almost no pressure. Seal everything with a glossy top coat, floating the brush so it never drags the art. Total time once you practise: about forty minutes a hand.

Choosing Polish, Tools and Salon Options
You do not need a huge kit. One sheer base colour, two pinks (one pale, one deeper), a brown for branches, a detail brush and a good top coat will produce every look in this article. Gel polish gives the crispest watercolour effect because it stays wet until cured, letting colours melt together; regular polish works if you thin it well and work quickly. At a salon, ask for watercolour or ink-style nail art and show photos — prices rise with the number of art nails, so the accent-nail version is the budget-friendly route. Press-on sets with blossom art are now widely available too; choose a milky base set and file gently to your shape for the most natural result. Whichever route you take, cuticle oil daily keeps the whole design looking fresh far longer than any top coat trick.
Common Mistakes to Avoid
The biggest mistake is using pink at full strength. Undiluted polish dries into hard stickers of colour and the watercolour illusion is gone; always thin it. Second, painting every nail identically — real blossom branches are random, so vary petal count and placement. Third, skipping base coat: sheer pinks stain natural nails yellow over time. Fourth, outlining petals in a dark colour, which turns soft flowers into cartoon stickers. Finally, applying top coat too slowly. One confident floating stroke seals the art; going back over it smears the delicate edges you worked to create. If a petal does go wrong, lift it off with a clean brush dipped in acetone before it dries and try again — watercolour is a forgiving medium precisely because everything is meant to be soft.
Frequently Asked Questions
How long do watercolour blossom nails last? In gel, expect two to three weeks; the sheer base hides growth so well that many people stretch to a fourth. In regular polish, plan on five to seven days with a top coat refresh on day three.
Can I do this design on very short nails? Yes. Use smaller petals and the travelling-branch idea from Way 8, or keep blossoms to two accent nails. The sheer base keeps short nails looking clean and lengthens them visually.
What colours work besides pink? Lilac, peach and soft coral all watercolour beautifully with the same technique. Keep the branch strokes brown-grey and the base milky so the spring feeling stays.
Is this design suitable for a wedding? It is one of the most requested bridal designs in spring for a reason: soft, romantic and it never competes with the dress or bouquet. The French-tip version is especially popular with brides.
How do I stop the petals looking blotchy? Thin the polish more than you think, load the brush lightly, and build colour in two passes instead of one. Blotchiness almost always means the polish was too thick or the base beneath was not fully dry.
Cherry blossom season lasts only a few weeks, but these nails let you carry a little of it with you. Start with the sheer scattered-petal version, learn how the thinned polish behaves, and the fancier branches will follow naturally. Soft, forgiving and endlessly variable — it is the rare nail art that is easier than it looks.