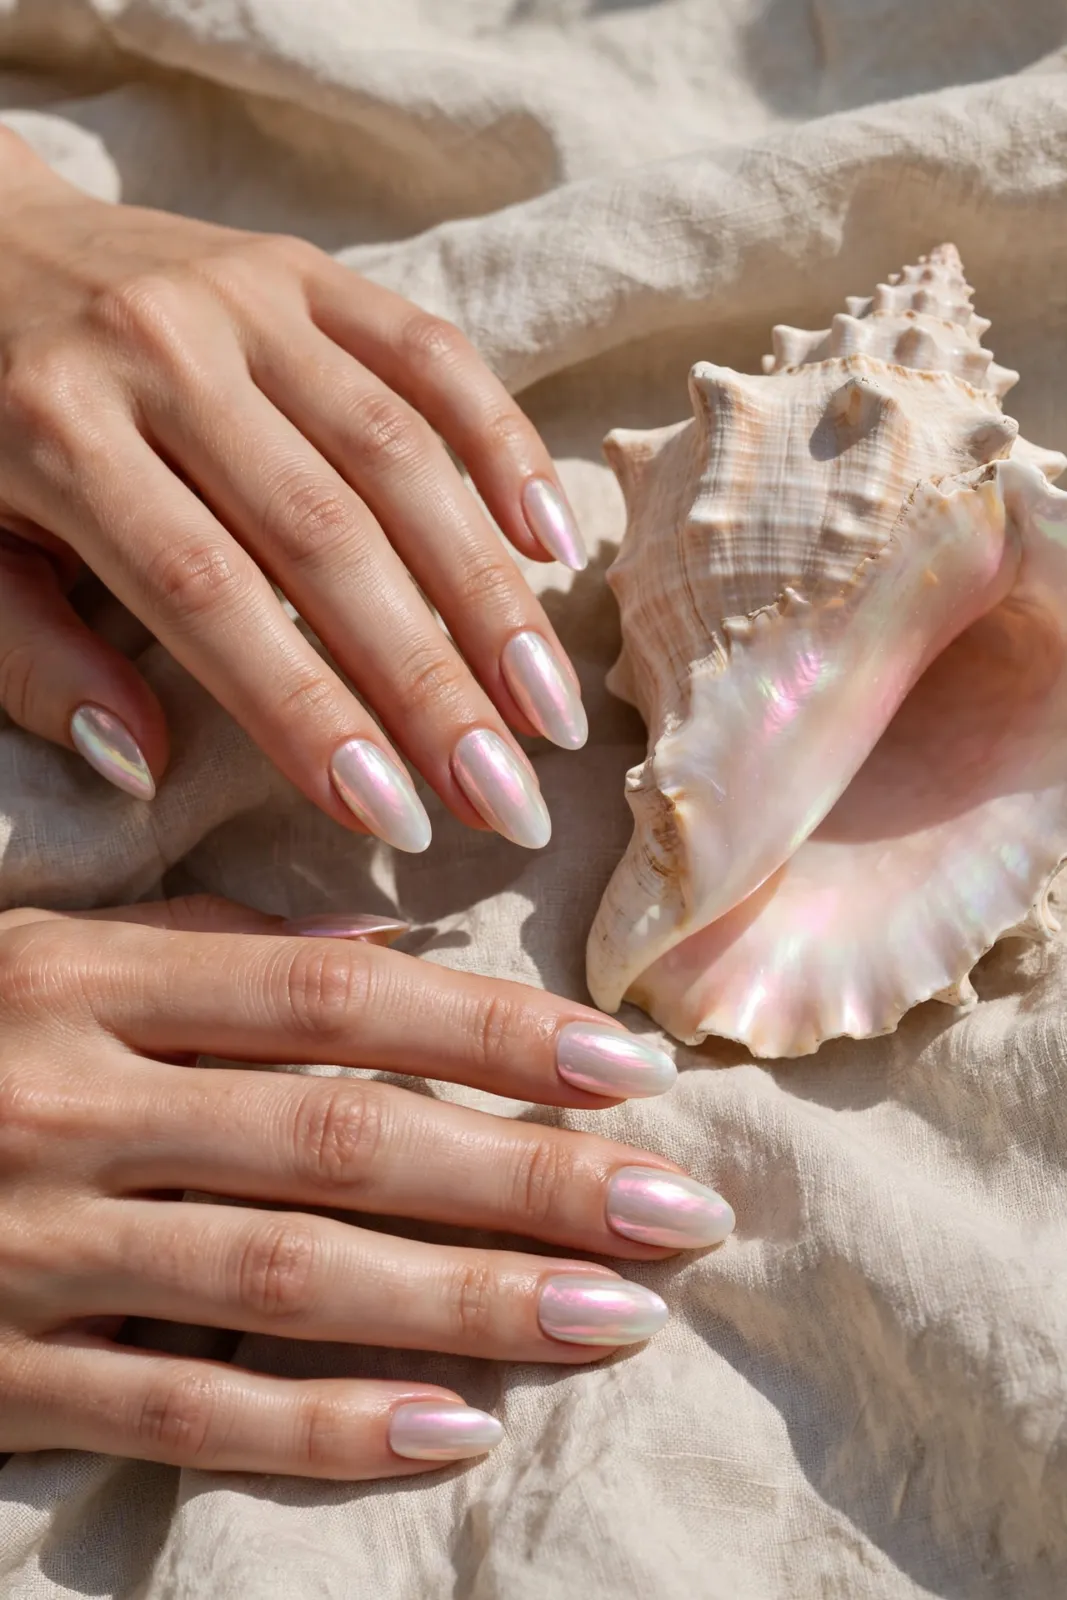
Some manicures only look good in the salon mirror, but a pearlescent shell tip manicure gets better the more daylight it meets. The finish imitates the inside of a seashell — milky, shifting, pink one moment and gold the next — and because it sits mainly at the tips over a soft base, it is forgiving, grow-out friendly and suitable for almost any nail length. The hero photo, taken beside a real shell, shows how close the effect comes.
I reach for this manicure when I want something polished that is not plain: weddings, holidays, weeks when my diary is full of different outfits and I cannot keep changing polish to match. Below are nine versions, the step-by-step for the shell sheen, and how to stop pearlescent finishes looking frosty or dated.
1, 2 and 3: Classic Shell-Sheen Looks
Way 1 — shell tips on a milky base. The hero look: a translucent milky base with the pearlescent finish concentrated on the free edge, like a French manicure reimagined by the sea. It elongates shorter nails, keeps the overall effect light, and suits every skin tone because the milky base can be warmed or cooled to match you.
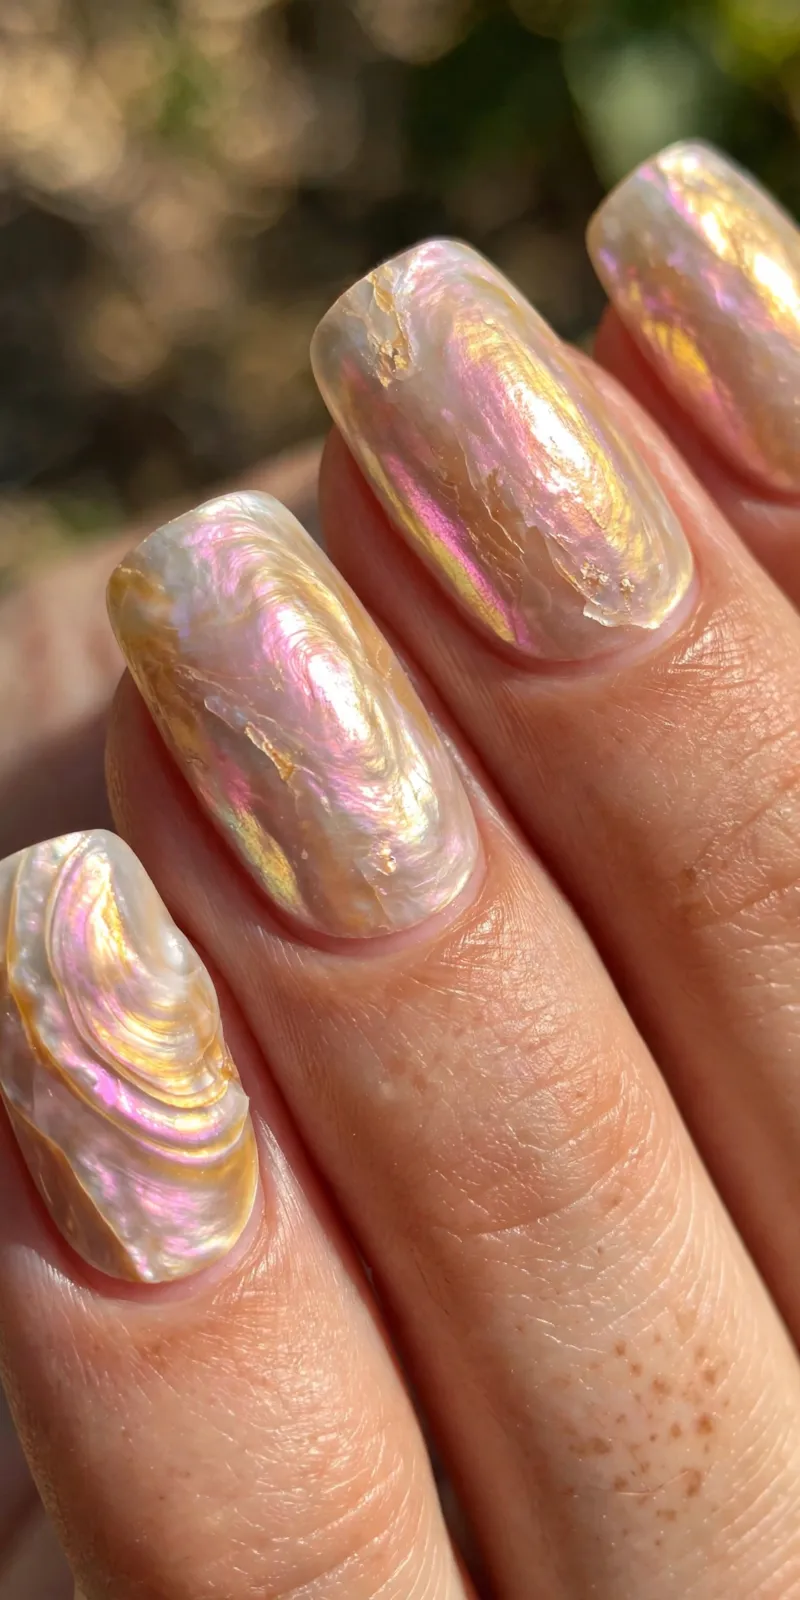
Way 2 — full-nail pearl sheen. Take the pearlescent finish over the whole nail, as in the close-up detail photo, where the colour swirls pink, gold and green. This version is bolder and more obviously iridescent, best on a smooth, well-prepped nail — every ridge shows under a reflective finish, so buffing and a ridge-filling base are essential.
Way 3 — shell tips with a pearl accent. Keep the manicure as in Way 1, then add one tiny flat-backed pearl at the base of each ring finger. It is a small detail that reads bridal and elegant, and because the pearls sit near the cuticle rather than the tip, they survive daily life far better than gems placed at the edge.
4, 5 and 6: Short, Soft and Beach Versions
Way 4 — short oval shell nails. The variation photo shows the finish on shorter oval nails, holding a pearl bracelet. Short nails make the sheen look fresh rather than glamorous, which suits everyday wear, and the oval shape has no corners to chip. If your nails break easily, this is the version that will actually last on you.
Way 5 — pink-tinted shell. Layer the pearlescent topper over a soft pink base instead of a milky one. The result is warmer and sweeter, flattering on hands that find pure white-based sheens a little stark. Keep the pink sheer — an opaque pink underneath kills the light-shifting quality that makes this manicure special.
Way 6 — beach-day shell set. For holidays, pair the shell tips with one accent nail painted as a tiny wave or left in a glossy aqua. The contrast is playful without undoing the elegance, and the mainly-light manicure hides sand, sunscreen and minor chips better than any dark holiday colour I have tried.

7, 8 and 9: Evening and Special Versions
Way 7 — shell sheen with gold edging. Trace a hair-thin gold line along the very edge of each tip over the pearlescent finish. It defines the nail in photographs and ties the manicure to gold jewellery. Use a fine liner brush and a light hand; the line should whisper, not outline.
Way 8 — layered shell chrome. For maximum glow, apply a pearl chrome powder over the tips instead of a polish topper, sealed under glossy top coat. The effect is smoother and more mirror-like. It is a salon job for most of us, but for an event it delivers the strongest version of the look in the beach-cafe lifestyle photo.
Way 9 — shell tips for a wedding party. Bridesmaids in different dress colours can share this one manicure, because the sheen picks up hints of whatever is near it. Keep everyone’s base the same milky shade and vary only the nail length to suit each person — the photographs look coordinated without anyone wearing an identical, forced set.
How to Create Shell Tips, Step by Step
Prep thoroughly: shape, gently buff, dehydrate the nail plate and apply a ridge-filling base. Paint one or two sheer coats of a milky nude and let them dry completely. Sponge or brush your pearlescent polish onto the outer third of each nail, feathering the inner edge so there is no hard line, and build a second layer only at the very tip for depth. If you are using chrome powder, apply it over a no-wipe top coat on the tips with an applicator, dust off the excess, then seal everything with a glossy top coat, wrapping the free edge carefully — iridescent finishes wear at the tip first.

Buying and Care Advice
Test pearlescent polishes in daylight before buying: under shop lights everything glows, but a good shell finish should still shift colour beside a window. Avoid very blue-white toppers if your skin is warm — they can look frosty. At home, reapply top coat every two to three days to protect the sheen, keep nails out of long hot soaks which lift reflective finishes, and moisturise cuticles daily, because dry skin makes even the prettiest iridescence look untidy in close-up.
Common Mistakes to Avoid
The classic mistake is applying the pearlescent layer too thickly over the whole nail, which produces the frosty, dated look people fear from pearl polishes. Thin layers, concentrated at the tip, keep it modern. Second, skipping the smoothing base: reflective finishes magnify ridges. Third, choosing a base that is too opaque or too pink, which flattens the shell shift. Finally, do not pair this manicure with heavy glitter on every nail — the two reflective finishes compete and both end up looking cheaper.

Frequently Asked Questions
Does a shell tip manicure suit short nails? Yes, it is one of the best designs for short nails. The light tips create the illusion of length, and the soft base means short nails look neat rather than stubby.
How is this different from a glazed donut manicure? They are close cousins. The shell version concentrates the iridescence at the tips over a milky base and shifts through more colours — pink, gold, a hint of green — rather than an even all-over glaze.
How long will it last? In gel, two to three weeks with the bonus that regrowth is barely visible against the milky base. In regular polish, about a week with top-coat refreshes.
Can I do it with chrome powder at home? Yes, if you already use gel at home. The powder needs a cured no-wipe layer to grip. With regular polish only, choose a pearlescent topper polish instead — it is simpler and nearly as pretty.
What colours does it go with? Almost everything, which is its charm: white, blush, sage, navy and gold all sit happily beside it. It is at its best against plain fabrics that let the shifting tips be the detail.
If you want one manicure that carries you from office to beach to wedding without a change, this is the strongest candidate I know. Keep the base sheer, the sheen thin, the tips the star — and enjoy watching your nails change colour every time the light moves.